飞腾派Linux调试环境:串口调试,交叉编译,uboot配置
串口调试环境
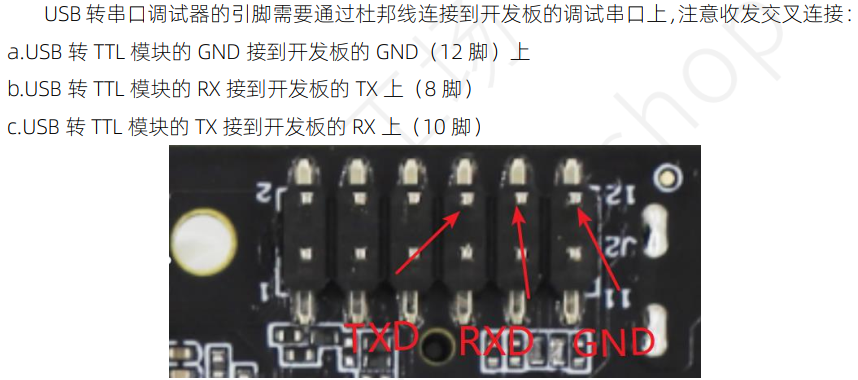
串口硬件连接
串口线的颜色和功能是对应的,4根线如下:
1 | 功能 线的颜色 |
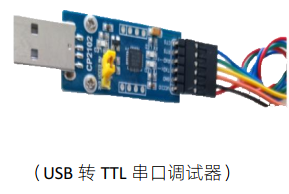
串口的接口类型取决于开发板接口,飞腾Pi是使用USB转TTL接口,有的开发板是板载串口转USB芯片,外部是USB直连PC,还有的是RS232接口。不管接口类型如何,串口转接芯片一般是CH340/FT232。
飞腾派接线只用了3根线,没用VCC。注意RX是接到TX, TX是接到RX。
验证串口连接正常:查找到ttyUSB设备即USB转串口设备连接正常。
1 | ls /dev/ttyUSB0 |
注:Ubuntu有时串口线找不到ttyUSB0设备,可能跟线的质量或者芯片驱动相关。在Ubuntu下FT232不需要安装驱动能稳定连接。Windows下串口转接芯片一定需要装对应的CH340或FT232驱动才能在设备管理器COM口看到USB设备。
Putty 配置串口调试环境
Putty连接串口需要以root用户启动。非root用户启动putty无法设置端口号,波特率等参数。
以root启动putty有两种方式:
- 以root启动putty GUI,在GUI中配置端口号,波特率等参数。
- 以命令行sudo启动putty,在启动参数中配置端口号,波特率等参数。
以root启动putty GUI:对于Ubuntu 22.04 Wayland桌面,使用sudo -E putty启动putty GUI。
参考:https://wiki.archlinux.org/title/Running_GUI_applications_as_root
以命令行sudo启动putty:
参考:https://readypinaple.com/using-putty-serial-terminal
对于我的调试环境(飞腾派),参数如下:
sudo putty -serial /dev/ttyUSB0 -sercfg 115200,8,n,1,N
Putty串口环境的复制和粘贴
Ubuntu22.04环境上有两种方法:
1.使用鼠标中键在terminal和putty之间复制和粘贴;此方法不能在选中之后再选中,否则内容被覆盖;
2.启动putty GUI后在selection设置ctrl+shift +C/V 复制粘贴。记得保存设置到session的default配置。terminal默认支持ctrl+shift+C/V操作。这种方式更稳定。
以上的ctrl+shift+C/V和中键操作属于两套剪贴板buffer,不会相互覆盖。即ctrl+shift+C复制的数据必须用ctrl+shift+V粘贴,中键选中的数据必须用中键粘贴。
Putty记录和查看log
记录log
在启动GUI后在session->logging设置记录all output,记得保存设置到session的default配置。
查看log
查看log可以使用less显示 + grep过滤;
关于less: 类似vim快捷键.
匹配查找:在less中查找可以使用 /或者?查找,参考以下less的help:
1 | /pattern * Search forward for (N-th) matching line. |
跳转到头尾:大G(跳到末尾)和 gg(重来到开头).
关于grep,有几点很常用:
a.有时log中有乱码导致被grep设别为binary导致grep无法显示,需要grep --text参数指定以文本打开:
例如要查看putty.log中mmc0模块的打印:
1 | cursorhu@ubuntu-PC:~/phytium/phytium-linux-kernel-v1.0.1$ less ~/putty.log | grep mmc0 --text |
b.有时需要grep多个关键字,使用grep -E “A|B”,注意一定要用引号扩起来
例如要同时查看mmc0和BHT的打印:
1 | less ~/putty.log | grep -E "mmc0|BHT" --text |
c.有时需要排除某关键字,例如飞腾的SD host有mmc0, mmc1两个,我只关注mmc0, 使用 grep -v KEYWORD去排除, v:invert match
1 | less ~/putty.log | grep --text -v mmc1 |
less+grep+less:
用less+grep过滤出log另存为新log, 再用less查看
1 | less ~/putty.log | grep --text -E "mmc0|BHT" > putty-bh201-tuning-error.log |
交叉编译
交叉编译方法
设置工具链环境变量+交叉编译命令如下:
1 | set_env.sh: 注意要用source执行才是export配置到当前环境变量,用sh或者./sh都是配置到子shell进程环境 |
安装编译的系统镜像和设备树:把编译机的输出image和dtb拷贝到SD卡系统盘的rootfs/boot/里,
1 | cp_image.sh: |
SD卡放回开发板启动,putty串口回车进入uboot,指定从SD卡系统盘的rootfs/boot/启动内核
1 | uboot.sh:(并不能直接在uboot运行) |
uboot配置
uboot自动选择指定kernel启动
背景:如下图,飞腾派启动指定内核需要设置uboot参数,由于飞腾派的uboot源码没有开放,不能用脚本(boot.scr)。调试新编译的内核,每次飞腾派启动都需要在putty粘贴uboot命令。开发效率低。

解决方案:将uboot命令配置到uboot环境变量,并保存到系统盘中使断电重启后uboot环境变量也生效。
参考mastering embeded linux programming, 使用bootcmd参数可以配置uboot script去执行一连串命令,实现类似shell script功能并保存,每次启动uboot不用复制粘贴一条条命令去启动。
以飞腾派为例,每次编译kernel后要从新编译的kernel启动,需要每次手动设置以下uboot命令/环境:
1 | #启动参数环境变量 |
目标:使uboot自动从以上命令语句指定的kernel启动:
对于环境变量bootargs不需要改动,我们只需要将命令语句设置到bootcmd环境变量。最后再一起saveenv使两个环境变量都保存到硬盘,重启后能自动生效即可。
- 如何设置bootcmd到uboot环境变量:
将以上uboot命令语句合成为一条语句设置到bootcmd:uboot命令的结束标志是分号,设置bootcmd时在内容语句的每个分号前需要加转移字符 , 这样setenv才会判断这个分号是要输入到bootcmd的字符,而不散表明setenv命令本身的结束。
1 | setenv bootcmd ext4load mmc 0:1 0x90100000 boot/Image\;ext4load mmc 0:1 0x90000000 boot/phytium-pi-board.dtb\;booti 0x90100000 – 0x90000000\; |
注意:上面指令拷贝到putty串口时时符号 -会消失,需要手动添加
- 如何使bootargs和bootcmd环境变量重启后也自动生效:保存(所有)环境变量
1 | saveenv |
- 重启后可以printenv查看配置生效,根据kernel打印可确认确实从指定kernel启动。
1 | Phytium-Pi#printenv |
5.如何删除env:变量设置为空即为删除:
1 | setenv bootargs |
附录:问题记录
ARM工具链报错问题
编译飞腾kernel有时会报错:
1 | cursorhu@ubuntu-PC:~/phytium/phytium-linux-kernel-v1.0.1$ ./build_kernel.sh |
报错内容指向以下patch:
可能原因:没有运行set_env.sh就直接build,生成的.confg有问题, ARCH=arm CROSS_COMPILE=XXX XXX_defconfig都没被写入到.confg文件
解决方法:删除kernel源码目录的.config文件:rm .config和.config.old,需要重启机器,再source set_env.sh重新设置环境变量, source build_kernel.sh, 编译就OK了