UEFI开发(一)EDK2环境搭建
官方文档:
https://github.com/tianocore/tianocore.github.io/wiki/Getting-Started-with-EDK-II
https://github.com/tianocore/tianocore.github.io/wiki/EDK-II-User-Documentation
下载代码
在C盘根目录用git命令下载edk2并下载submodule:
1 | git clone https://github.com/tianocore/edk2.git |
如果要切换到stable tag版本:
1 | git tag -l #列出tag, -l: list |
我的环境是VS2022,当前edk2 master主线支持VS2022,而最新的stable tag不支持,所以用master版本,没必要checkout到stable tag。
编译EDK2
编译环境准备
参考:https://github.com/tianocore/tianocore.github.io/wiki/Windows-systems
按 Build 下载NASM和ASL二进制包,放到C盘跟=根目录(和edk2同路径)
运行edksetup.bat,编译edk2/BaseTool
1 | C:\edk2>edksetup.bat |
log中的一些信息含义:
(1)新版本edk2已经包含python包,无需自己再去下载和指定python路径
1 | PYTHONPATH = C:\edk2\BaseTools\Source\Python; |
(2)已自动设置nasm路径
1 | Found nasm.exe, setting the environment variable to C:\nasm\ |
(3)用VS2022编译,CLANG_BIN不用设置
编译输出二进制在edk2\BaseTools\Bin
编译目标模块
运行edksetup后,再执行编译:
1 | build |
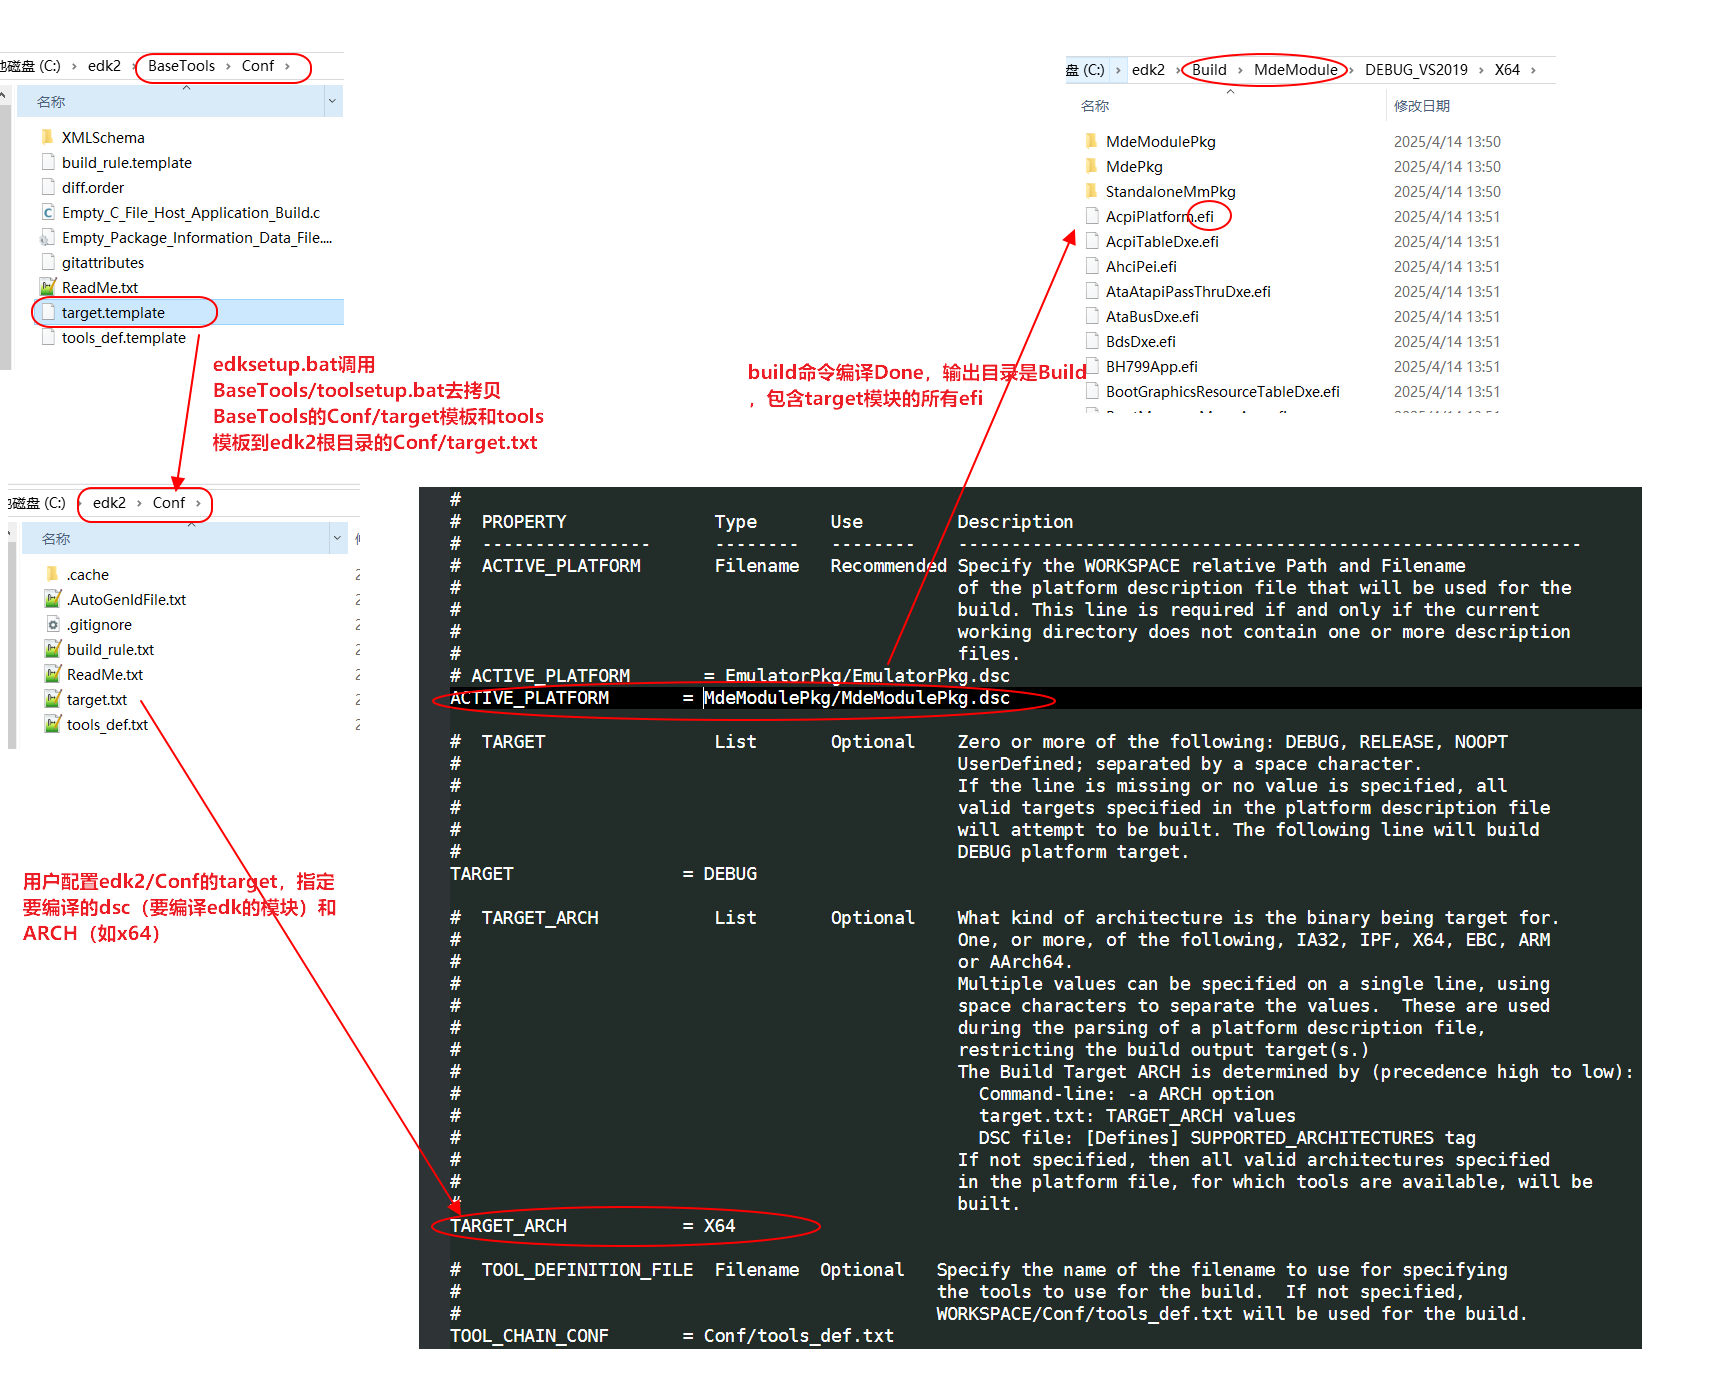
编译目标由edk2/Conf/target.txt的ACTIVE_PLATFORM和TARGET_ARCH指定
终端乱码问题
在编译前可用以下命令将命令行的输出转成UTF8格式,防止输出乱码:
1 | chcp 65001 |
下图说明从Conf/target的产生到编译完成的全流程
搭建UEFI shell启动盘
创建UEFI shell盘
- 找一个U盘,格式化成FAT32,然后在U盘根目录下建立/efi/boot目录。
- 自己编译UEFI shell.efi或者下载Shell.efi
- 把Shell.efi改名成BOOTX64.efi,然后把BOOTX64.efi拷贝到U盘/efi/boot/目录下。
- 自己编译的其他UEFI程序,如MdeModulePkg Application efi或者DXE efi驱动,都可放到U盘根目录
- U盘插入电脑,开机后按F12(不同厂商电脑可能有所不同)进入UEFI menu选择页面,选择从U盘启动
(1) 如何自己编译UEFI shell.efi:
前面edk2编译环境ok后,改Conf/target.txt为编译ShellPkg:
1 | ACTIVE_PLATFORM = ShellPkg/ShellPkg.dsc |
编译完成后输出Shell.efi在Build/Shell/
1 | Finished generating code |
(2)下载编译好的Shell.efi
https://github.com/pbatard/UEFI-Shell/releases
包含各平台的shell.efi
startup.nsh脚本
UEFI Shell.efi启动时会查找根目录下有没有startup.nsh脚本,如果有的话会自动执行startup.nsh脚本
比如U盘在UEFI shell下的盘符为 FS0: ,想要启动自动执行根目录的myUefiApp.efi程序,startup.nsh脚本如下
1 | #切换到FS0盘符的根目录 |
也可以用绝对路径执行MyUefiApp.efi,即
1 | FS0:\MyUefiApp.efi |
进入UEFI shell
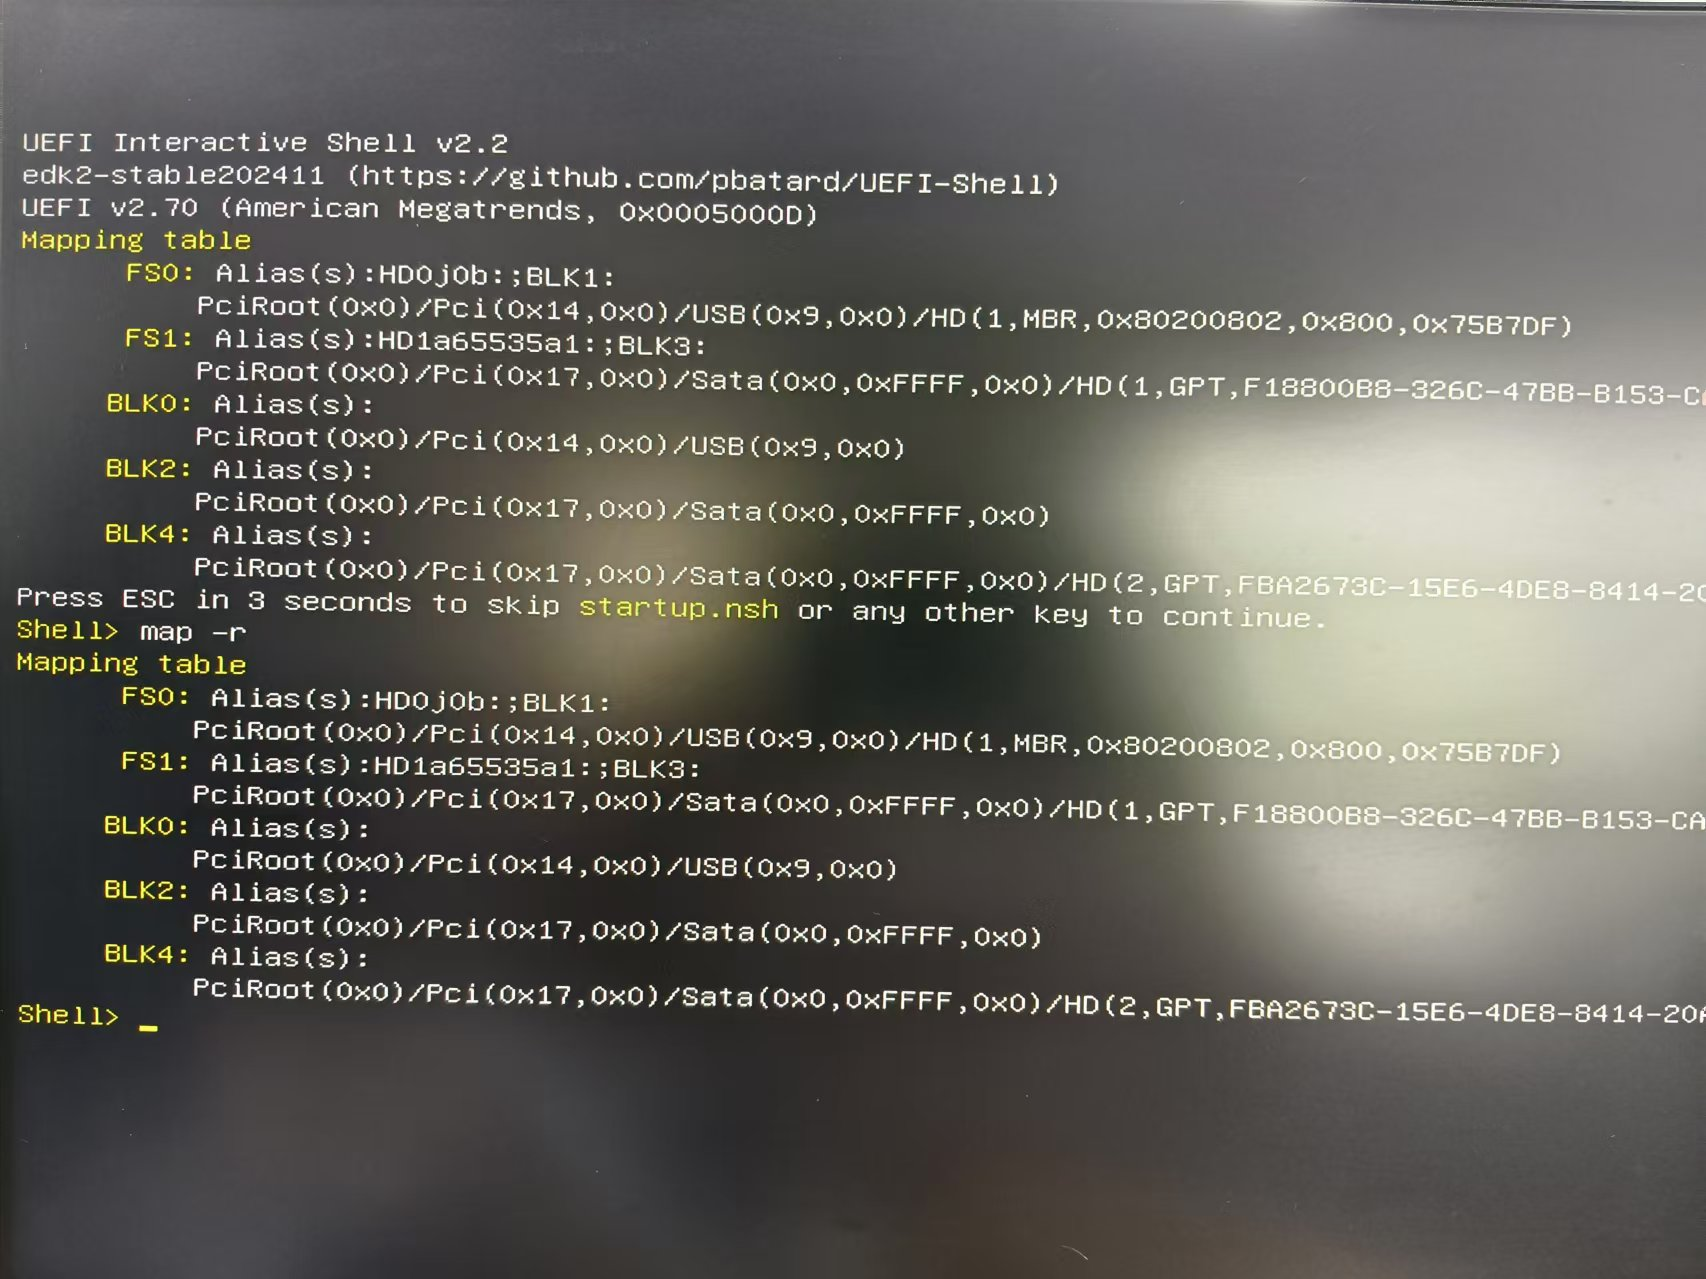
如图是F12进入U盘UEFI shell环境,其中:
UEFI shell版本v2.7,可见来源信息
map -r显示可识别设备信息:
FS是filesystem文件系统设备。FS0是USB设备,位于PCi bridge 0x14上;FS1是Sata硬盘,位于PCi bridge 0x17上
BLK是文件分区。BLK0是USB的分区,BLK2和4都是Sata硬盘的文件分区
copy+startup加快测试
https://ss64.com/nt/xcopy.html
调试efi经常要重新编译和拷贝efi到u盘,用copy命令自动化
build编译模块时,输出的efi已经拷贝过一次。这里再创建一个.bat拷到u盘(E盘根目录)
1 | copy /y C:\edk2\Build\MdeModule\DEBUG_VS2019\X64\MdeModulePkg\Bus\Pci\SdMmcPciHcDxe\SdMmcPciHcDxe\OUTPUT\SdMmcPciHcDxe.efi C:\edk2\Build\MdeModule\DEBUG_VS2019\X64\SdMmcPciHcDxe.efi |
这样编译后自动拷贝到U盘,在UEFI测试机上创建startup.sh自动运行efi驱动加载:
1 | fs0: |