ubuntu搭建跨平台markdown写作环境
ubuntu安装picgo
下载picgo安装包:
github:https://github.com/Molunerfinn/PicGo/releases/tag/v2.3.1
下载慢可以搜索国内镜像,bing搜索安装包名能找到国内镜像:
https://mirrors.sdu.edu.cn/github-release/Molunerfinn_PicGo/v2.3.1/
注意:安装PicGo AppImage,不要使用snap包,否则typora配置上传功能有问题
安装PicGo AppImage
AppImage是可以直接运行而不需要安装的包:Unlike other applications, AppImages do not need to be installed before they can be used. However, they need to be marked as executable before they can be run. This is a Linux security feature.
1 | chmod +x PicGo-2.3.1.AppImage |
运行picgo有个小图标,需要右键打开主窗口。
Picgo配置Github图床
建议使用Jsdelivr加速配置github图床。参考:PicGo + GitHub 搭建个人图床工具
我个人的github图床配置如下(见picgo配置文件):
"github": {
  "repo": "cursorhu/blog-images-on-picgo",
  "branch": "master",
  "token": "ghp_xxxxxxxxxxxxxxxxx",
  "path": "images/",
  "customUrl": "https://raw.githubusercontent.com/cursorhu/blog-images-on-picgo/master"
}
如果Jsdelivr挂了就用github raw url:
1 | "customUrl": "https://raw.githubusercontent.com/cursorhu/blog-images-on-picgo/master" |
Picgo其他配置如下:
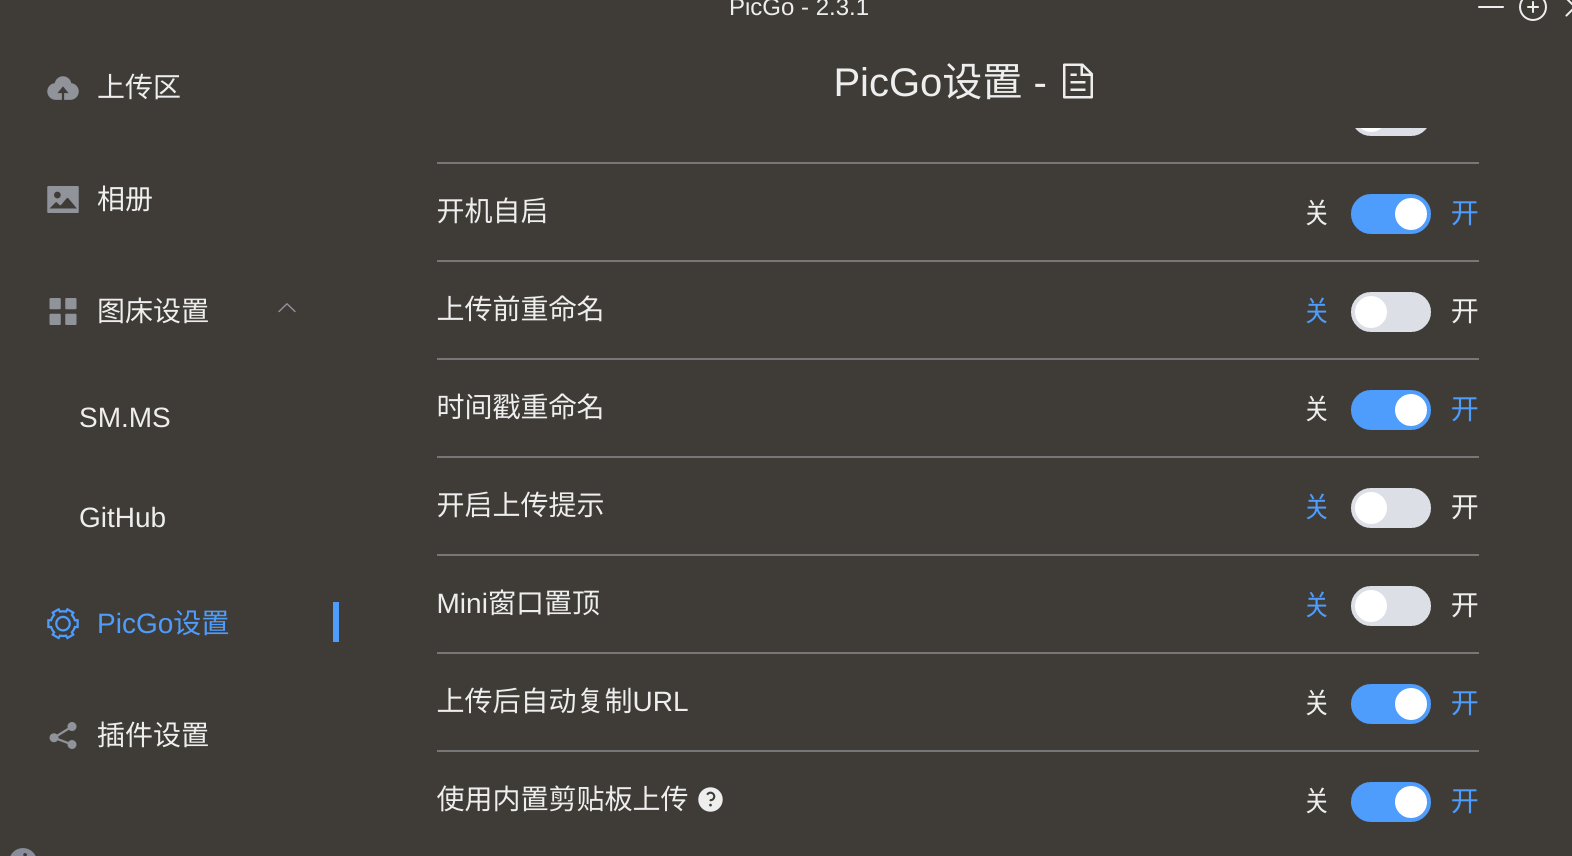
Picgo配置完需要测试在GUI上传图片OK.
注意:如果已经传了很多文章和图片,jsdelivr突然挂了,如何修复图床链接:
全局替换已写文章中的图片链接:将https://cdn.jsdelivr.net/gh/账户名/图床仓库名@master 改为: https://raw.githubusercontent.com/账户名/图床仓库名/master
Typora使用Picgo Appimage上传图片
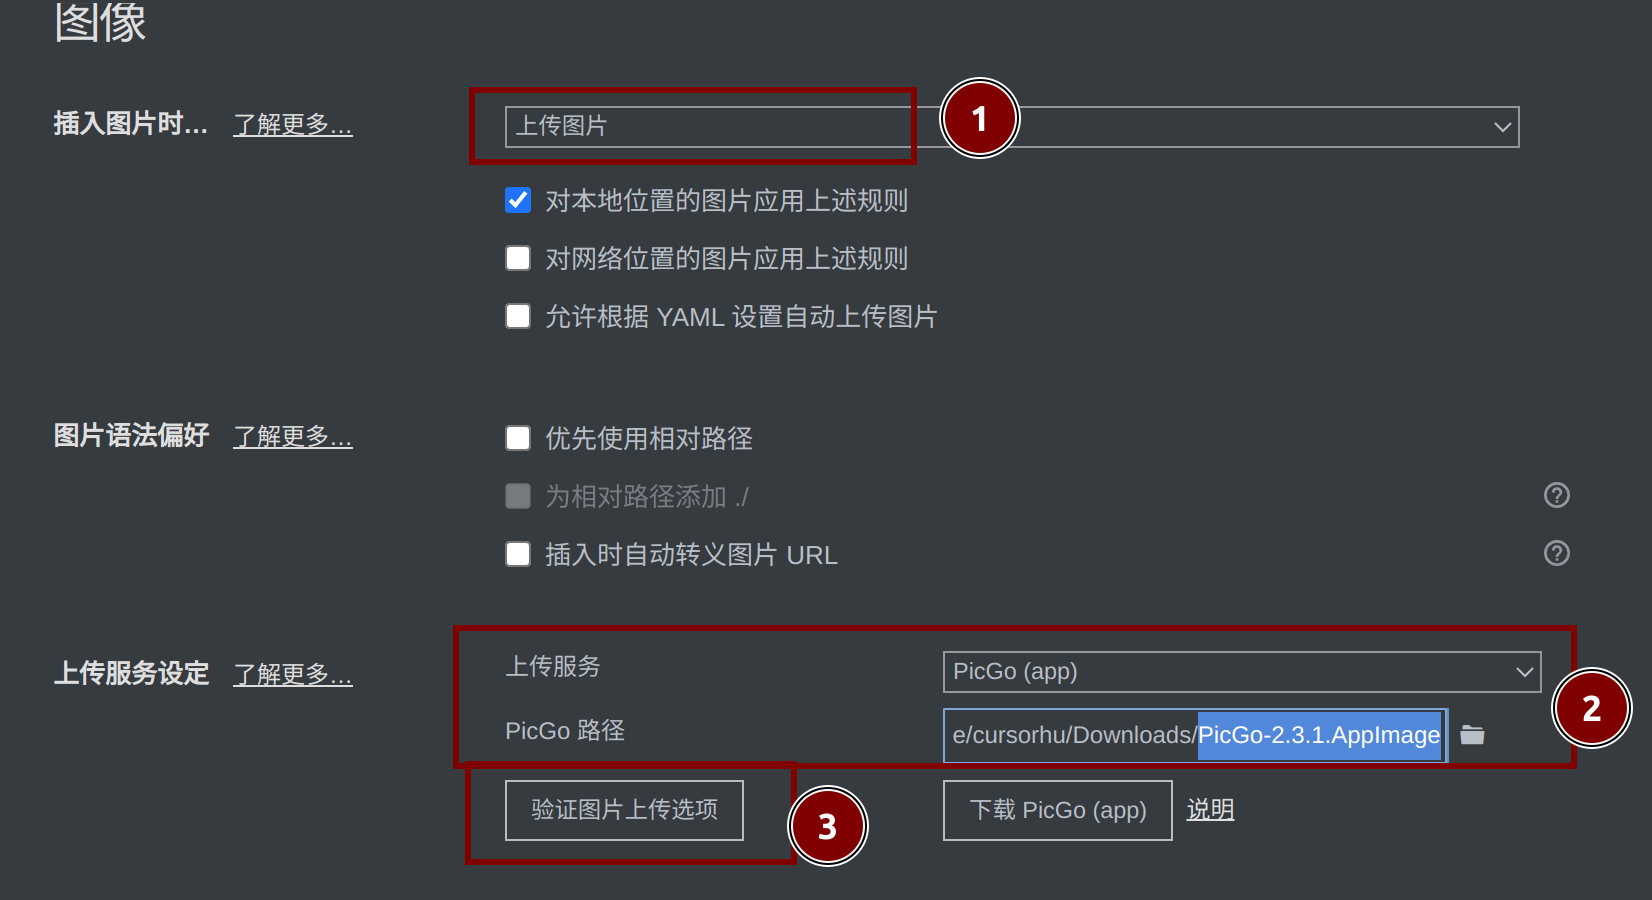
Picgo测试OK之后,直接配置Typora的粘贴图片 == 使用PicGo AppImage上传图片。
注意:使用剪贴板图片上传,需要apt install xclip,一般系统自带。
附录(配置Picgo桌面图标)
可解压AppImage去配置Picgo桌面图标:
1 | ./PicGo-2.3.1.AppImage --appimage-extract |
附录(废弃方案记录)
最开始打算用smms图床或者gitee图床+picgo+typora, 配置没有成功,换github就OK了。这里只记录不成功过程。
本地安装.snap包:picgo snap包不能正常上传,这里只记录安装方式
直接snap install xxx.snap会报错:
cannot find signatures with metadata for snap “picgo_2.3.1_amd64.snap
.snap本地离线安装的标准流程是snap download xxx + snap ack xxx + snap install xxx:
1 | $ snap download hello-world |
https://askubuntu.com/questions/1266894/how-can-i-install-a-snap-package-from-a-local-file
但gicgo包没有assert,只能用另外的dangerous模式安装:
1 | sudo snap install /path/to/my-snap.snap --dangerous |
安装Node.js环境:为了安装picgo-core,这里只记录node安装方式
安装nodejs(包括npm包管理工具):sudo apt install nodejs npm 这种方式能用,但nodejs版本可能太低,因此建议指定nodejs版本 >=16 再apt install:
https://www.linode.com/docs/guides/install-nodejs-on-ubuntu-22-04/
1 | curl -sL https://deb.nodesource.com/setup_20.x | sudo -E bash - |
如果已经安装低版本,需要apt remove nodejs + apt autoremove彻底清除再装。
typora使用picgo core上传(失败)
1.安装picgo core配置文件
参考:
1 | #安装picgo-core |

typora使用自定义命令上传(成功但不适用)
参考:https://picgo.github.io/PicGo-Doc/en/guide/advance.html#upload-using-command-line
命令行验证是可以上传已复制到剪贴板的图片:
1 | ./PicGo-2.3.1.AppImage upload |
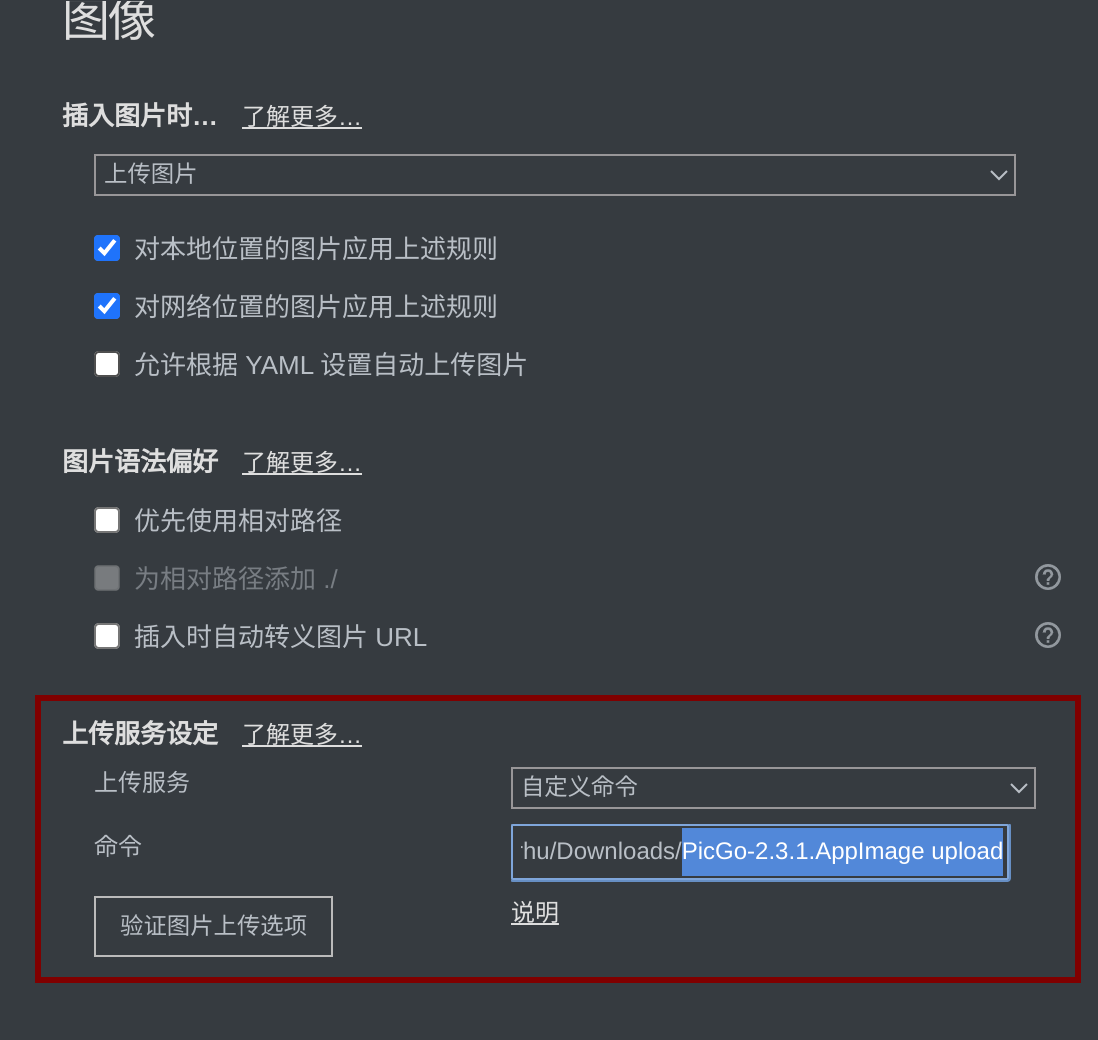
配置Typora使用该自定义命令:
效果:不方便,粘贴图片后的上传完成链接在剪贴板上,需要再粘贴一遍才是上传到服务器的图片链接。
参考文章
https://blog.csdn.net/yefcion/article/details/88412025
https://blog.csdn.net/weixin_45636061/article/details/124335243
https://www.cnblogs.com/usmile/p/14842233.html